

Formatting vs. Linting: Understanding the Key Differences
Introduction:
In the world of software development, every line of code, every indentation, and every semicolon can make a significant difference in the functionality and readability of a program. Two practices that play a crucial role in maintaining code quality and consistency are linting and formatting. While often used interchangeably, these two concepts serve distinct purposes in the development process.In this blog post, we'll delve into the nuances of linting and formatting, exploring their respective roles, their differences, and how they contribute to writing clean, maintainable code. So let’s get started!

1- Understanding formatting:
Formatting is the action done by a formatter, which is a tool that reads into your source code, and rewrites it in a more organized way. Think of formatting as the interior designer of your codebase, ensuring that every line is neatly arranged, properly indented, and visually coherent.
Code formatting tools, such as Prettier, automate the process of styling your code according to predefined rulesets or style guides. They eliminate the need for manual formatting, saving developers valuable time and reducing the risk of inconsistencies across the codebase.

Formatting rules can cover a wide range of aspects, including indentation, line length, spacing, and even the placement of braces and parentheses. By adhering to a consistent formatting style, developers can improve code readability, facilitate code reviews, and maintain a professional standard across their projects.
2- Exploring the role of linting:
While formatting is concerned with the aesthetics and layout of your code, linting focuses on detecting errors and enforcing coding conventions.
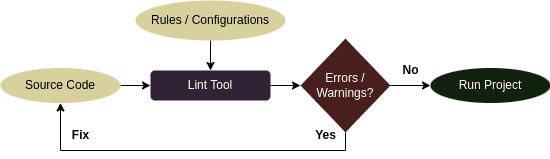
Linting is done by a linters: a set of tools that run checks on your code, it is like having a vigilant inspector that scrutinizes every line of your program, flagging potential errors, stylistic inconsistencies, and coding conventions violations. It acts as a guardrail, helping developers identify and rectify issues before they manifest into larger problems during runtime.
These tools analyze the syntax and structure of your code, checking for common pitfalls, such as unused variables, missing semicolons, or even potential security vulnerabilities.
Linters, like Eslint for example, can be highly customizable, allowing developers to tailor them to suit the specific requirements of their projects and coding styles. They offer configurable rulesets, enabling teams to enforce coding standards consistently across their codebase and promote collaboration and code maintainability.
3- Key differences :
While both linting and formatting contribute to code quality, they operate at different levels of abstraction and serve distinct objectives. Linting helps catch errors and enforce coding standards at the syntactic level, while formatting enhances the visual consistency and aesthetics of the code.Linting primarily focuses on code correctness and adherence to coding standards, flagging issues that may impact the functionality, performance, or security of the application. In contrast, formatting deals with the visual appearance and layout of the code, enhancing readability and maintainability without necessarily affecting its functionality.To put it simply, Formatting is to maintain code clarity, and linting is to check for good code functionality.
4- Setting Up ESLint and Prettier in Your Project:
Now that we understand the importance of linting and formatting, we will apply those concepts to a Node.js app. For this example, we will use the commonly most used linting and formatting tools for javascript: ESLint and Prettier.
We will also be using visual studio code as our code editor. It is a lightweight but powerful tool that is available cross platform. I encourage you to use it for your javascript projects.
a- Initialize your project:
Begin by creating a new directory for your project and navigate into it, then open the project using vscode:
1md eslint-prettier-example
2cd eslint-prettier-example
3code .
Initialize a new Node.js project by running npm init and following the prompts. This will create a package.json file in your project directory:
1npm init -yIn the same folder, create a new file and name it main.js with the following code inside it:
1let test=5
2function multiplyTest(x){
3  return test*x
4}
5var result = multiplyTest(5);
6     console.log("result is:",result);
In the package.json file, add a script called start, This executes the code inside the file when you run it:
1"scripts": {
2  "start": "node main",
3},
b- Initialize ESLint configuration in your project:
On the left panel of visual studio code, select extensions. In the search bar type ESLint and choose the one made by Microsoft. Go ahead and install it:
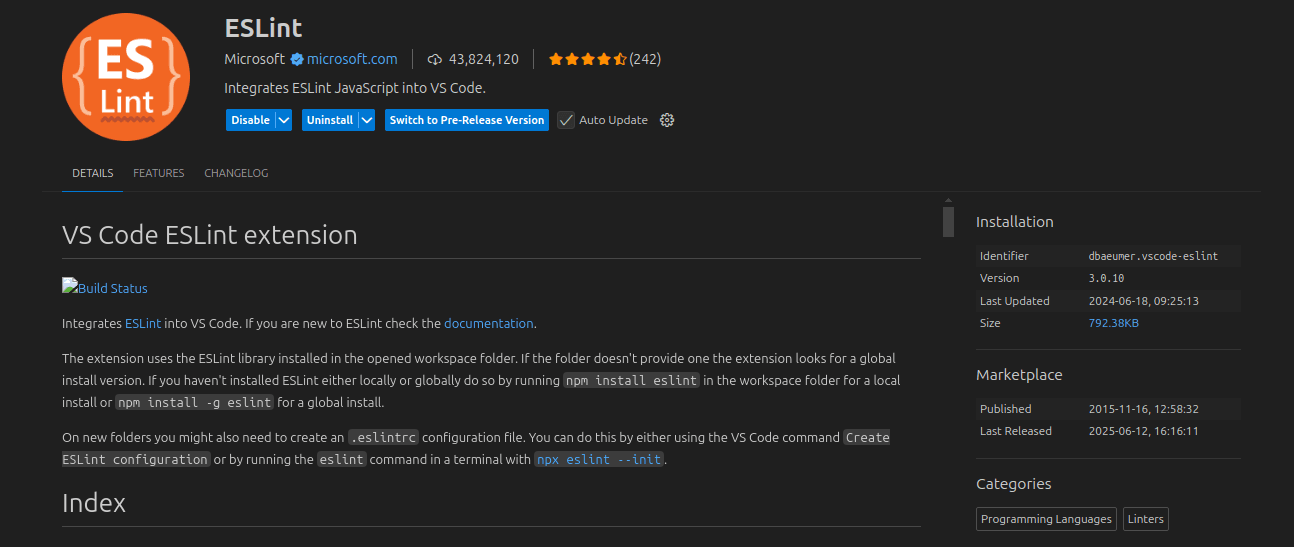
This extension is very helpful since it will highlight code errors and warnings.
Start by executing the following code in your terminal:
1npm init @eslint/config This will ask you a couple of questions:
- How would you like to use ESlint? … To check syntax, find problems, and enforce code style
- What type of modules does your project use? … JavaScript modules (import/export)
- Which framework does your project use? … None of these
- Does your project use TypeScript? … No
- Where does your code run? … Node
- How would you like to define a style for your project? … Use a popular style guide
- Which style guide do you want to follow? … Airbnb
- What format do you want your config file to be in? … JSON
- Would you like to install them now? … Yes
- Which package manager do you want to use? … npm
In the package.json file, add a new script called lint, this script will ask ESlint to check for errors and warnings in the whole project:
1"scripts": {
2 "start": "node main",
3 "lint": "eslint ."
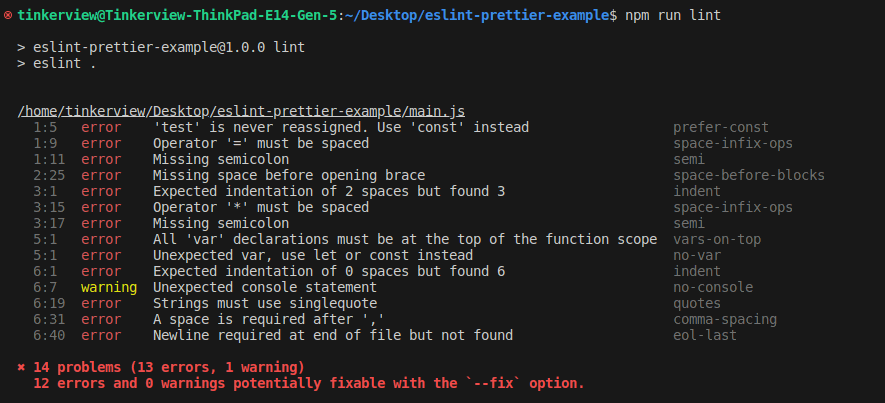
4},Now run npm run lint, the result displays a list of errors and warnings found in the main.js file:
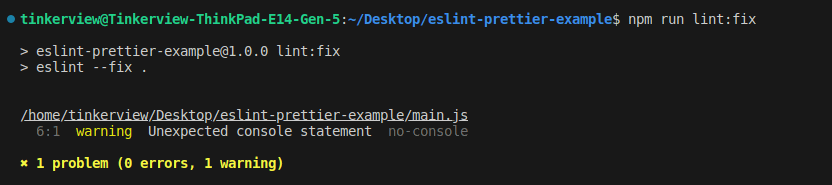
Linter is working as expected, fantastic! Now we want to fix those errors, we can do that manually or we can autofix most of it by adding the --fix flag, so open package.json and add the lint:fix script:
1"scripts": {
2  "start": "node main",
3  "lint": "eslint .",
4  "lint:fix": "eslint --fix ."
5},
Now run npm run lint:fix
Everything looks good, except maybe you want to make your own custom rules. We can do this! Just open your .eslintrc.json and add these 2 new rules to the rules property:
1"rules": {
2  "indent": ["error", 4], //changes the indent spaces to 4 from 2.
3  "no-console": "off" //turns off the console warning.
4}
Run npm run lint again:

One final thing, in a single command, we want ESlint to check for errors, then only run the code if there are 0 errors. For that, we change the start command in the package. json file as follows:
1"scripts": {
2  "start": "eslint . && node main",
3  "lint": "eslint .",
4  "lint:fix": "eslint --fix ."
5},
Now if you run npm run start, and voila! Everything works as expected.
c- Install Prettier in your project:
To do that, just run the following command:
1npm install prettier eslint-plugin-prettier eslint-config-prettier --save-devBefore working with prettier, we want to add the prettier plugin and configurations to ensure they work accordingly. And to do that we need to open .eslintrc.json file and apply those changes:
1"extends": ["airbnb-base", "plugin:prettier/recommended"],
2"plugins": ["prettier"],
3"parserOptions": {
4  "ecmaVersion": "latest",
5  "sourceType": "module"
6},
7"rules": {}
Now add another script for formatting:
1"scripts": {
2  "start": "eslint --fix . && node main",
3  "lint": "eslint .",
4  "lint:fix": "eslint --fix .",
5  "format": "prettier --write ."
6},
Go to your main.js file and make a mess in your code:
1const test=5;
2function multiplyTest(x) {return test* x;
3}
4const result = multiplyTest(5);console.log("result is:", result);
Now run npm run format, now what this will do is it will organize all the code files in your project:
1const test = 5;
2
3function multiplyTest(x) {
4  return test * x;
5}
6
7const result = multiplyTest(5);
8console.log("result is:", result);
Cool, now we might want to use a custom configuration. So in the project folder add a file named .prettierrc.json and add the following rules:
1{
2  "tabWidth": 4, //changes the indent spaces to 4 from 2.
3  "semi": false, //removes semicolons.
4  "singleQuote": true //replaces double quotes with single quotes.
5}
Now run npm run format, and observe the changes on the main.js file:
1const test = 5
2
3function multiplyTest(x) {
4 return test * x
5}
6
7const result = multiplyTest(5)
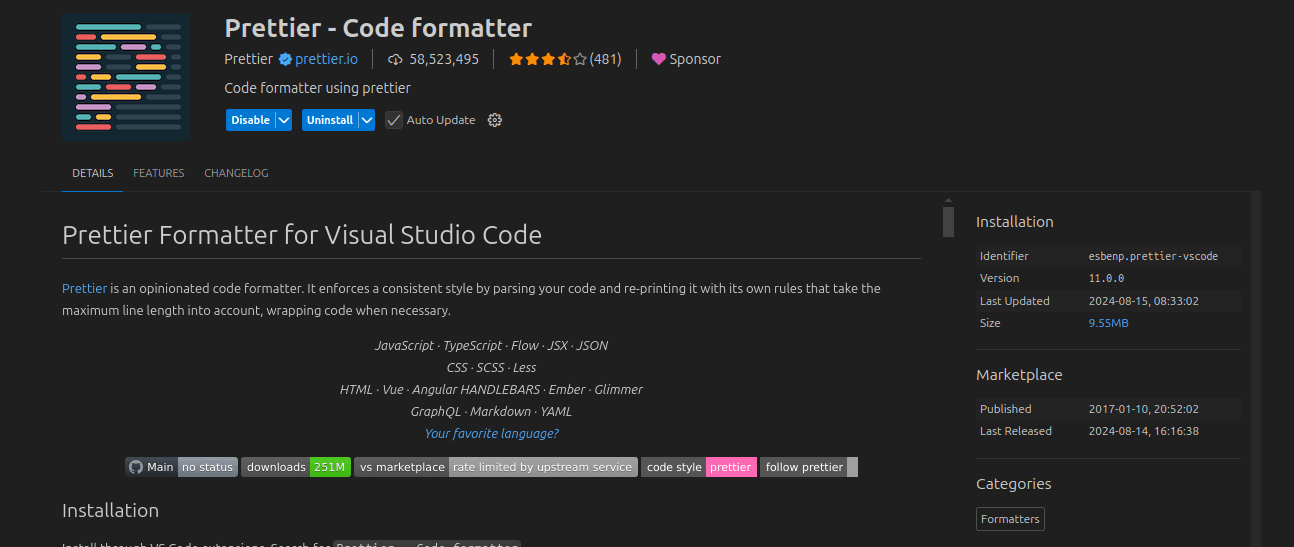
8console.log('result is:', result)You can also integrate prettier into your vscode environment using the prettier extension. To do that, navigate to the left panel and select extensions and search for Prettier - Code formatter and select the one made by Prettier
When the installation is complete, press Ctrl + Shift + P > select Format Document With… > select Configure Default Formatter… > select Prettier - Code formatter
Now to format your code, open the code you want to format and press Ctrl + Shift + I.
You can also configure visual studio code to format code on save. To do that, go to settings, search for Format On Save, and enable it.
And we are done! Feel free to change the configurations as much as you like, because the best way to learn is to experiment with the code. These configurations will apply for all team members that work on this project.
5- Conclusion:
In conclusion, linting and formatting are indispensable tools in the arsenal of every software developer. By combining the power of static code analysis and automated code styling, developers can elevate their coding standards, improve code quality, and enhance collaboration within their teams.
Whether you're striving to catch errors early in the development cycle, maintain a consistent coding style across your projects, or enhance the readability of your codebase, linting and formatting offer invaluable benefits. By embracing these practices and integrating them seamlessly into your development workflow, you can embark on a journey towards writing cleaner, more maintainable code.
So, the next time you embark on a coding adventure, remember the importance of linting and formatting in shaping the landscape of modern software development. Embrace these practices as allies in your quest for code quality and craftsmanship, and watch as they empower you to unlock new levels of efficiency and excellence in your coding journey.